
How Easily Can I Fit A Rooflight?
So you’ve decided to install a rooflight in your home, but have you considered how to fit it?
There are two options when it comes to fitting your rooflight: you can hire a contractor to install it for you, or roll up your sleeves and get started.
If you decide to go with the latter, it’s essential to familiarise yourself with the process first. That way you can be confident with the job at hand and with the end result. Download our installation guides here.
Who Should Install It?
There are two options when it comes to fitting your rooflight: you can hire a contractor to install it for you, or roll up your sleeves and get started.
If you decide to go with the latter, it’s essential to familiarise yourself with the process first. That way you can be confident with the job at hand and with the end result. Download our installation guides here.
However, unless you’re a trained builder or have years of DIY experience, we would recommend seeking the expertise of a contractor, even if it’s purely for consultation.

What Equipment Is Supplied?
This all depends on the manufacturer and style that you go for. However, if you choose to buy your rooflight from EOS, the following equipment will be supplied:
What Equipment Is Supplied?
This all depends on the manufacturer and style that you go for. However, if you choose to buy your rooflight from EOS, the following equipment will be supplied:
With an upstand
- One upstand ( if requested)
- One glass lid
- Two security screws
- Six standard screws
- Four flashings
If you decide to hire a contractor, they should be able to supply the following equipment, but otherwise you need to invest in it:
- Roof membrane
- Four arris rails
- Six to eight brackets
- Two timber wedges – if your roof’s pitch is below 3º

Without an upstand
- One glass lid
- Two security screws
- Six standard screws
- Four flashing
- Eight gaskets
You will also need:
- Materials to construct an upstand
- Roof membrane
- Four arris rails
- Six to eight brackets
- Two timber wedges – if your roof’s pitch is below 3º
Tools Needed
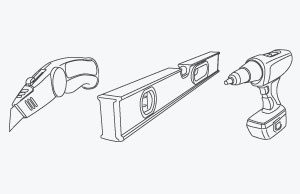 Your rooflight will come with all the necessary materials but not the tools required for installation. If you don’t already have the following tools, we would recommend hiring or investing in them.
- Power drill
- Stanley knife
- Spirit level
Installation
Before installing your rooflight, ensure that the areas surrounding it are clean and clear of debris. Any roof joists and decking should be secured fastened down and you need to check that you have enough manpower to safely lift and install your rooflight.
Step 1
Remove all of the packaging and check that you have all the parts required. Then place the lid on a flat surface to avoid damage. If your rooflight has an upstand, be sure to put this out of the way of the lid to reduce the risk of breakage.
Step 2
Place the upstand over the opening in your roof. Check that the pitch of the upstand is between 3 and 15 degrees using a spirit level. If it is any less than 3 degrees, water will simply sit on the glass.
Step 3
Fit the upstand using the brackets provided and secure it using the arris rails.
Step 4
Now you need to weatherproof the upstand using the membrane. Once this is completed you will need to fit the flashings to the upstand.
Step 5
Place the rooflight lid over the upstand to check that it will fit securely. Then secure the lid using the safety screws provided. Next, use the remaining screws to securely fit the unit in place.
And there you go; it’s as easy as that. Remember that if you get stuck at any point you should contact your supplier or contractor for advice and assistance. Don’t forget to visit download our installation guides here
Our other products
Rooflights

We offer a wide range of rooflights designed for flat and low pitched roofs.
LaNterns

Our slim line lanterns are a modern twist on the traditional.
Skylights

Frameless design coupled with exceptional thermal performance.